In an attempt to break up the monotony of teaching a novel (Teachers, we have to admit that this can happen from time to time, even the best teachers.) my colleague Amy and I decided to create an escape room-like activity surrounding Lord of the Flies. Actually, we did two. One for the middle of the novel, and one for the end.
So, what is an escape room, exactly? Across the nation, businesses have sprung up that offer experiences where you and a handful of friends are locked in a room (or a couple rooms) and you have to solve puzzles and clues in order to get out. With most rooms you only have an hour. These are really fun to do with friends and even use for team building exercises with colleagues.
This seemed like an easy enough task. Until we had to set it up. Amy found both the escape rooms we conducted on Teachers Pay Teachers (links are below). We did adapt them just a bit to suit our needs, and Amy was a gracious guinea pig by testing them out with her own students first. For reference, Amy used it on her Regular 10 English class, and I used this for my Honors English 9 class.
The first escape room we did gave students slips of paper, each with a symbol and an event from chapters 1-3 of the novel. The first task was for students to put them in order, and the number of slips per chapter gave them a code to unlock the decoder. From there, they used the decoder to decipher a message. Once they cracked the first three chapters, they needed to complete chapters 4-6. This one seemed pretty easy for Amy’s students to complete, so when it was my turn, I wanted to spice it up a bit and make it more complicated. Instead of making it a break-out game within the classroom, I decided to use the library’s two identical production rooms and make it as much of an escape room as possible, without, you know, locking them in the room. Thanks to Amy, I was able to use fun distractors and places to hide clues inside a hollowed out bolt, which I hid in an already existing hole in the wall (yes, there was literally a hole in the wall); a fake thermometer, in which to hide a key; fake dictionaries, blacklight/invisible ink pen message written on a poster, lock boxes, using both word locks and number locks; and a puzzle saved on the desktop of the rooms’ computers.
The second escape room was something I conducted within the classroom and it had a total of 5 tasks to complete. In order to complete the final task, students needed to use all the clues from the first four. This one didn’t utilize any locks or hidden clues or anything, and I have to say the students seemed to enjoy this one more than the previous one. I thought the first room was cleverer, but one student said it really stressed her out. She is more the competitive type, though, so I didn’t worry too much about her stress level.
Observations:
- The biggest difference I observed between how students worked through the first escape room and the second was that with the first, I didn’t control how they moved through the tasks. It was designed to be linear, with students completing one task to move to the next, but what ended up happening with each of the four groups is that they found all the cool and sneaky things first and then had to go back and put it all together. They actually went straight to the final clue and solved it before even trying to put the little slips in order and decode the message. I wouldn’t let them out of the room until they had completed all of the steps. If you’re a teacher, you know that frustration when students don’t read the directions. It can be maddening! With the second “escape room” I had more control of their pace and progress. In order to get the second task, students needed to solve the first one, and so on. What was really fun with the second escape room was the Oops! cards. When someone “let the fire out,” they were put in a “time out” for 3 minutes. I generally reserved these for those students who were more bossy or took control over the whole group.
- On three separate occasions, students assumed I had made an error in the design of the tasks, when in fact it was them not thinking through the activity or they had (two different groups) had dropped a piece of the puzzle underneath a chair. I don’t think this behavior is exclusive to this type of activity, however. Many times in my own classroom, students will assume they have turned in something and I have misplaced it before doing a thorough search of their own backpack only to reveal they never turned the assignment in in the first place. (Sound familiar, anyone?)
- It is key (pun intended) to keep a log of your locks and their combinations so you have an idea of what you have and how to use them again. I would strongly suggest you spend the extra money and purchase locks that have keys to reset them. It is worth the extra expense.
- If you anticipate doing a lot of walking/running between escape rooms, wear comfortable shoes!
- Make sure you have extra copies of everything you need. (I had to run and make copies during the first escape room and it was stressful!)
- Find a colleague to help you plan this. It was incredibly helpful to have someone to bounce ideas off of and to help troubleshoot and find holes in your puzzle sequences.
- Finally, I found that the natural helper/teacher in me wanted to offer hints to help groups solve their puzzles. This is something I really had to be cognizant of and keep myself in check. I wanted students to work and rely on each other, not me. I think both students and myself found this frustrating, but I saw this as a positive stressor.
You may be wondering: what does planning something like this look like? To answer this, I am going to take you through the first escape room activity.
1. Amy purchased the first escape room from Teachers Pay Teachers, but I tweaked it quite a bit to fit with what I
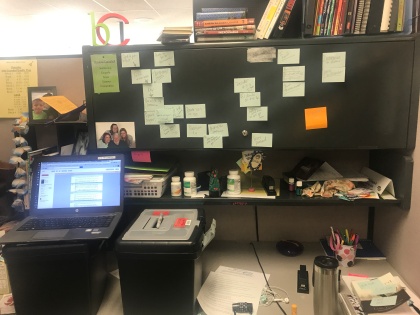
The sticky notes show the sequence of activities.
envisioned. This activity gave students slips of paper with events from chapters 1-6 and students were required to place them in order, and use a decoder (that they found from another clue) to identify the final message. So, taking this already created activity, I wanted the transitions between puzzles to be more challenging, so first we planned the transitions on my cubicle cabinet.
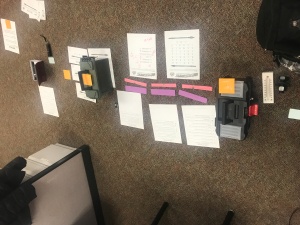
The angle of this photo makes it hard to see, but the tasks are all lined up in order.
2. Once the sequences seemed logical and were planned, then we put all the items (lock boxes, false dictionaries, fake bolts, blacklight pens, etc.) in order.
3. After going through the escape room several times ourselves and practicing it, I was then ready to set it aside, but didn’t want to lose the order.
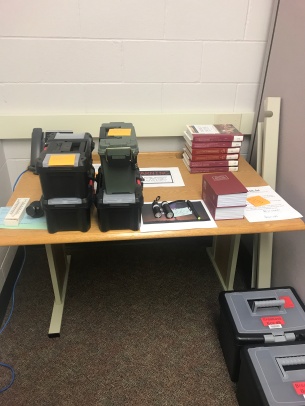
And here it is, all ready to go! If I’m honest, when I see it like this, I am disappointed because it took a lot more time and effort to condense it all into these neat little piles.
If you’ve made it all the way to the end of this post, thank you for taking the time to read about an idea that worked really well for my students, and one I’ll definitely be doing more of in the future! If you have questions, please don’t hesitate to leave a comment or email me at bscampbell@mpsomaha.org.
Thanks!
B.Campbell
